The payroll file in its original form must be uploaded to the database and stored in the database and the file removed from the directory. A copy of the file in a formatted manner must be made available so that the format errors can be addressed through the application.
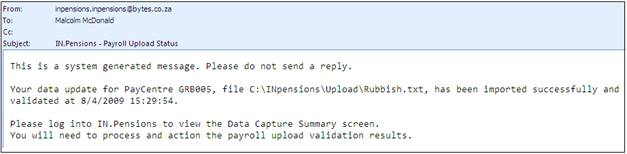
A message confirms that the file is being processed.
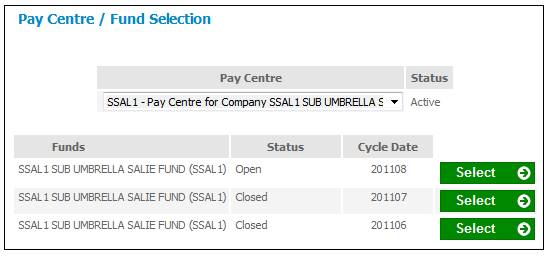
The Pay Centre / Fund Selection screen will be displayed.
The user linked to the pay centre will receive an e-mail advising that the file submitted has been received.
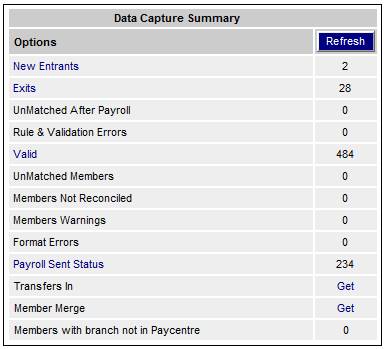
Return to the Data Capture Summary screen which will show all the errors and successes of the file loading.
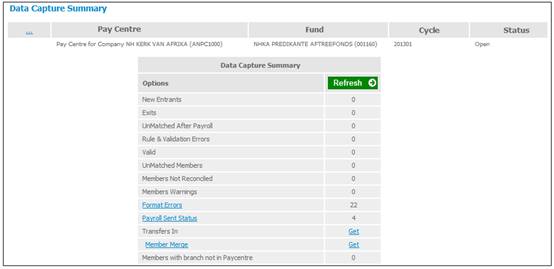
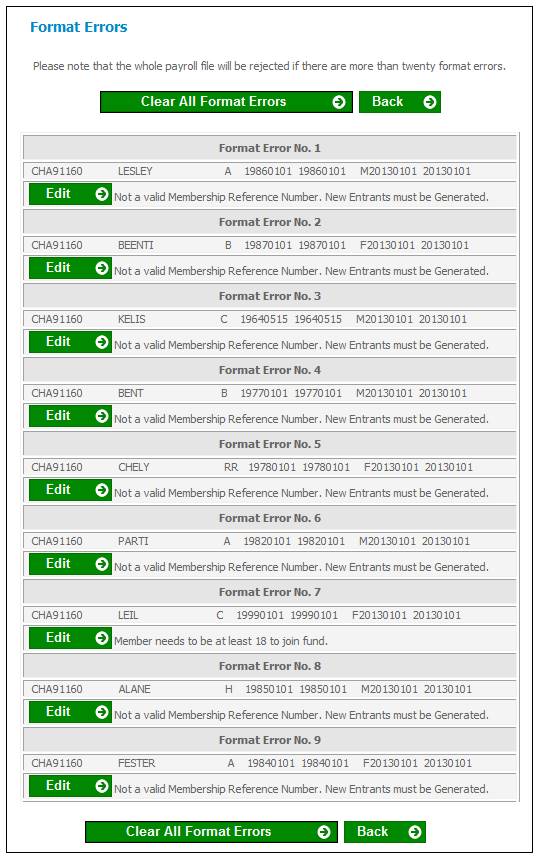
To view any errors, click the Format Errors hyperlink. The Format Errors screen will be displayed.
From the Payroll menu, click ![]() alongside payroll Load on the sub-menu on the left. Additional options will be displayed.
alongside payroll Load on the sub-menu on the left. Additional options will be displayed.

Click Text File Load / Status belowPayroll Load. The Upload Payroll File screen will be displayed.
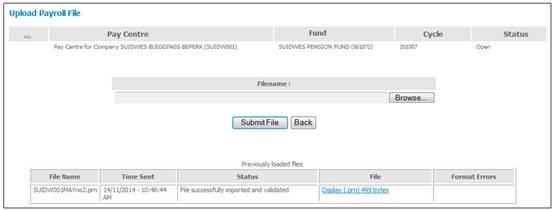
To view the content of a file, select the Display hyperlink in the File column alongside the required File Name.
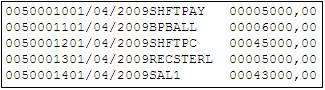
The following are examples of the data displayed:
Example 1:
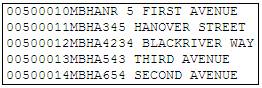
Example 2:
Example 3:

To view details of the specific errors found, click the List Errors hyperlink in the Format Errors column alongside the required File Name. The Format Error List screen will be displayed.
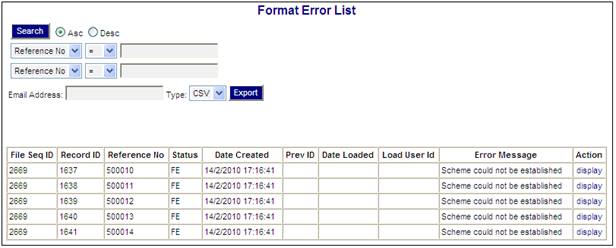
This screen lists details of the errors.
The following columns are displayed on this screen:
- File Sequence ID
- Record ID
- Reference Number
- Status
- Date Created
- Prev ID
- Date Loaded
- Load User ID
- Error Message
To edit the errors, select the display hyperlink in the Action column alongside the required Format Error. The Format Errors screen will be displayed.
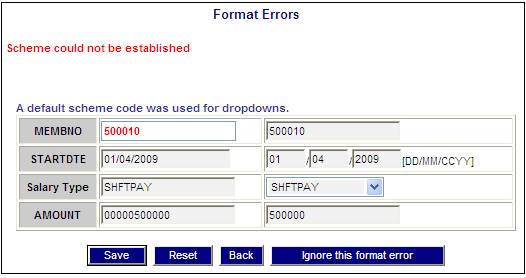
This screen displays the format errors in red.
The left side of the screen displays the data in its current format. The right side of the screen is editable in order to correct errors.
Once the necessary fields have been edited on the right side of the screen, click SAVE to save the changes.
To return any changes made on the right side of the screen back to their previous value, click RESET.
To return to the File Format Errors screen, click BACK.
To ignore the format error, click IGNORE THIS FORMAT ERROR. A warning message will be displayed.
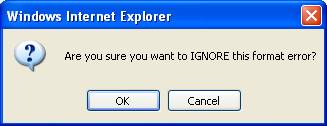
Click OK to confirm the message or click CANCEL to cancel the action.
Under certain error conditions, a fatal error may be encountered with a particular record in the middle of an upload. The upload will stop and subsequent records will be ignored. A message will be written to the error log.
The following messages will be written when such a situation arises:
- On the Data Capture Summary screen, the message UPLOAD INTERRUPTED BY FATAL ERROR. SEE ERROR LOG. will be displayed.
- On the Upload Payroll File screen, the message UPLOAD INTERRUPTED BY FATAL ERROR. SEE ERROR LOG will be displayed.
The data that has been loaded via the payroll process will now have been validated against the scheme rules and the various fields will have been translated with the conversion values.
The following is a sample of the payroll take-on data file layout that was used to load data for the above fund and pay centre:
12341021 000100018009306107080 00011101FENDRO O 19800930010000000000 E2004010120040101FWMY02BA0001000000+MN 000000000000000020040131001000000+00050000+00100000+00000000+00000000+00000000+00000000+00000000+00000000+ 00000000
The following is an example of a member's screen showing the data that will display after the payroll file has been loaded:
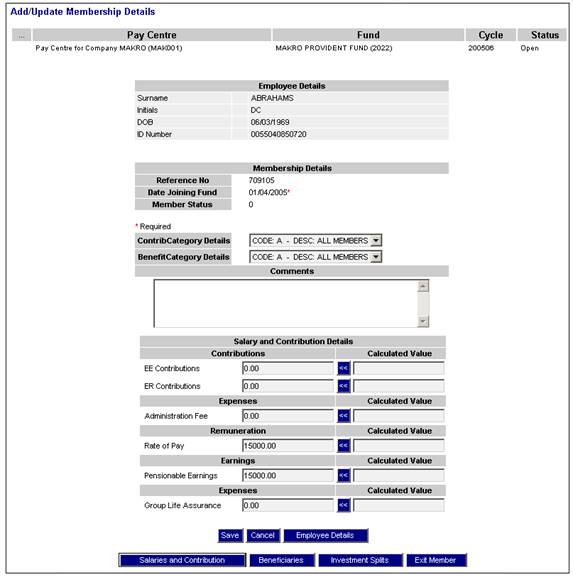
For each of the shift/earnings/salary/hours, there will be a value above and this page is dynamic depending on what has been configured on the scheme.
For the additional NI category, that will be displayed under the benefit category.
For the employee details above, only the fields that have been mapped in under fund fields will be shown. The order of the fields can be set for a neater display than above.
There is a certain set of data that is mandatory for the system and these are highlighted with an asterisk. If these fields are missing during the load, then rule and validation errors will be advised as these fields will be forced to be fixed before the monies may go for investment.
The following functionality is the automation of Salary Sacrifice to automatically change members' membership groups allocations in cases where they have opted out of or have opted for salary sacrifice contributions.
Select the Valid option on the Data Capture Summary screen.
The Valid Records screen will be displayed.
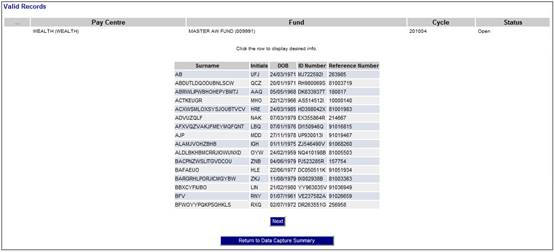
Select the required member from the list. The Add/Update Membership Details screen will be displayed.
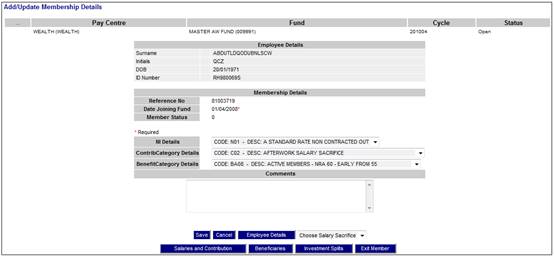
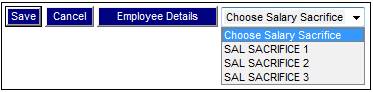
A Choose Salary Sacrifice drop-down list will be displayed.

Choose a salary sacrifice value from the drop-down list.
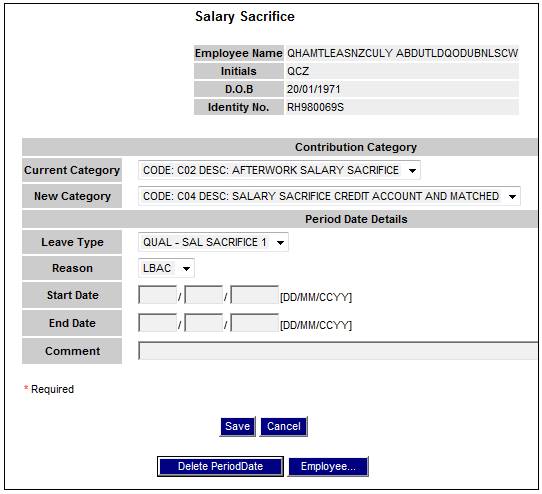
The Salary Sacrifice screen will be displayed.
Note:
The member has been moved from the member’s existing Contribution Category to a new Contribution Category for Salary Sacrifice.

Descriptions of the input fields on the Salary Sacrifice screen appear below.
|
Current Category |
The member’s current Contribution Category. |
|
New Category |
The member’s new Contribution Category for Salary Sacrifice |
|
Leave Type |
The Salary Sacrifice that was selected in the Choose Salary Sacrifice drop-down list is displayed.
Note: This value cannot be changed once the original selection has been made. |
|
Reason |
Select a value from the drop-down list. |
|
Start Date |
The start date of the salary sacrifice. |
|
End Date |
The end date of the salary sacrifice. |
|
Comment |
Capture free form text about the salary sacrifice. |
To view or update the employee details for a member, click EMPLOYEE. The Amend Member Personal Details screen will be displayed.
To delete a Salary sacrifice record, click DELETE PERIOD DATE.
The following message will be displayed:
Are you sure you want to delete this Period Date?
Click OK to confirm deletion.
Note:
A maximum of 3 Salary Sacrifice records may be created, as there are 3 Salary Sacrifice Types.
Once the data has been captured, click SAVE.
The Period Date Details screen will be displayed with the captured data.
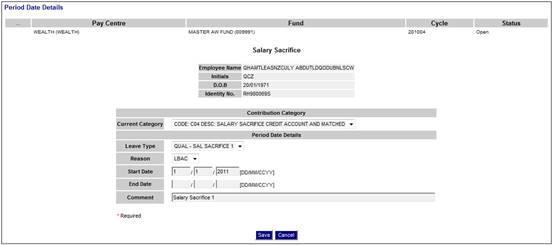
This is the place to record the member choices for the contribution split.
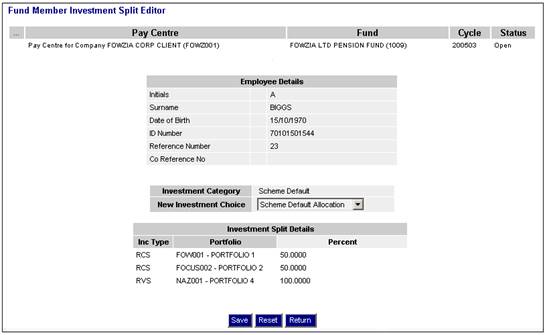
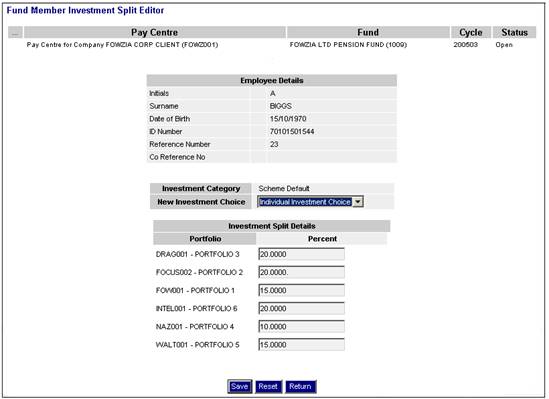
To add investment splits to the membership, click INVESTMENT SPLITS on the Add/Update Membership Details screen. The Fund Member Investment Split Editor screen will be displayed.
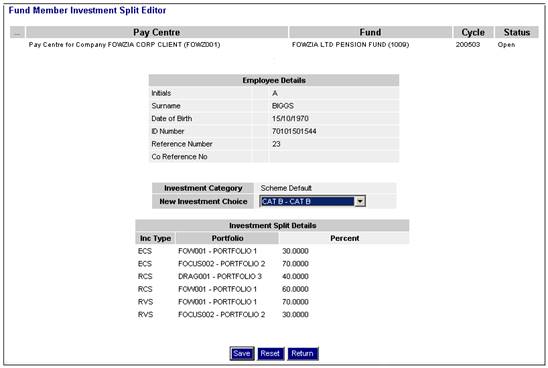
This screen displays the current investment splits applicable to the member. The member may choose one of the following:
- the scheme default allocation (which applies, by default, to all members of the scheme)
- the category default allocation (which applies, by default, to all members of the category)
- the individual investment option available to each member, which overrides the scheme default option
- an investment membership group.
If no selection is made by the member at an individual level, the scheme default will apply.
Descriptions of the input fields on this screen appear below.
|
New Investment Choice |
This displays the investment options available to the member. The following options are available in the drop down box: - INDIVIDUAL INVESTMENT CHOICE - SCHEME DEFAULT ALLOCATION - CATEGORY DEFAULT ALLOCATION - INVESTMENT MEMBERSHIP GROUP |
If INDIVIDUAL INVESTMENT CHOICE is selected, and the value for the Closed From Date field on the JU1BV Scheme Portfolio Details screen is less than or equal to the Effective Date of the Scheme Update, the portfolio will not be displayed for selection.
If an investment membership group is selected, the members’ investment split will be that of the membership group. The system displays the membership group default splits under the Investment Split Details portion of the screen.
If investment membership groups have been set up for the scheme and no selection is made, the system displays the splits for the default membership group under the Investment Split Details portion of the screen.
If Individual Investment Choice is selected, you will be able to allocate percentage splits for the portfolios under the Investment Split Details portion of the screen.
Based on the mask selected, the payroll file detail is validated against the scheme information. Any errors are reported as rule and validation errors, or format errors.
To access the errors, click on the appropriate hyperlink on the Data Capture Summary screen.
Examples of format errors:
Note:
Some of these will not be applicable to the SAP load.
- Not a valid Income and Expense Type
- Not a valid Membership Reference Number
- Payroll record could not be linked to a Fund
- Payroll record could not be linked to a Fund - Benefit and Contribution Categories are invalid
- Company could not be linked to the current company structure
- Payroll record could not be linked to a Pay Centre
- Date of Joining Fund cannot be prior to Commencement Date of Fund
- Date of Joining Company cannot be greater than Current Cycle
- Date of Joining Fund cannot be less than Date of Joining Company / or invalid
- Date of Joining Fund cannot be greater than Current Cycle
- Duplicate: Employee already has a Membership in this fund
- Zero reference number required for new Employee details for this fund
Format errors (or page error messages) will be generated in the following instances:
- Where a reference number is zero and activation has not been enabled
- Where a reference number is blank or spaces and activation has not been enabled
- Where a reference number is zero, activation has been enabled, but no reference number range has been captured
- Where a reference number is zero, activation has been enabled and a reference number has been generated, but benefit and contribution category is missing
Note:
Where the exit date is zero or blank, it will not be recognized as a valid date and the member will not be flagged as an exit. There is no validation when the exit date is invalid - the record will just be ignored. Members will only be flagged as exits where the exit date is valid.